HOW TO AUTHENTICATE YOUR DOMAIN
Your eimmigration system can send email notifications directly to caseworkers and clients. By default, these emails will be sent from the @eimmigration.com domain.
You can adjust your system settings so that all emails come from your company domain instead of the eimmigration domain. To do this, you must authenticate your company domain.
Domain authentication is a crucial step to ensure that your domain is secure and recognized by our system. This article will walk you through the process of authenticating your domain step by step.
Before You Begin
-
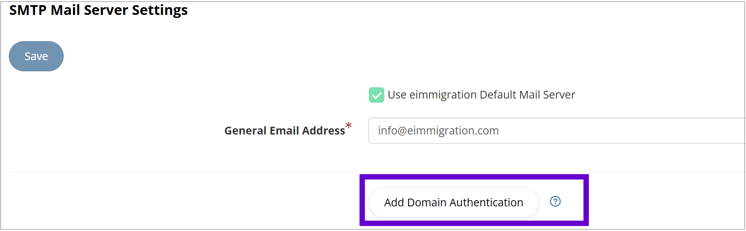
Ensure that the General Email Address is set to info@eimmigration.com. This is required for successful authentication.
-
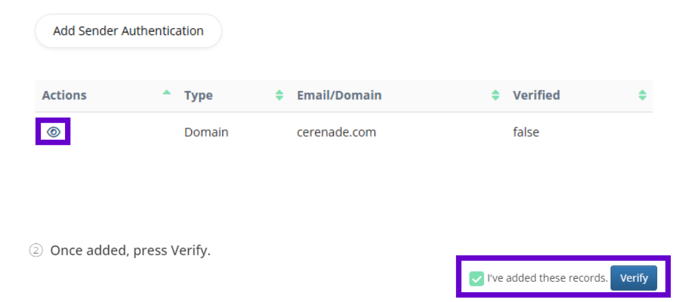
If you've already added your domain, you can view and manage it by clicking the eye icon () in the Domain Authentication list.
Prerequisites
-
Access to the email account associated with the domain you wish to authenticate.
-
Administrative access to the DNS settings of your domain.
Step 1: Access SMTP MAIL SERVER SETTINGS in Administrator Portal
-
Login to the Administrator Portal

-
Navigate to Application Settings located at the bottom of the Administrator Home page.
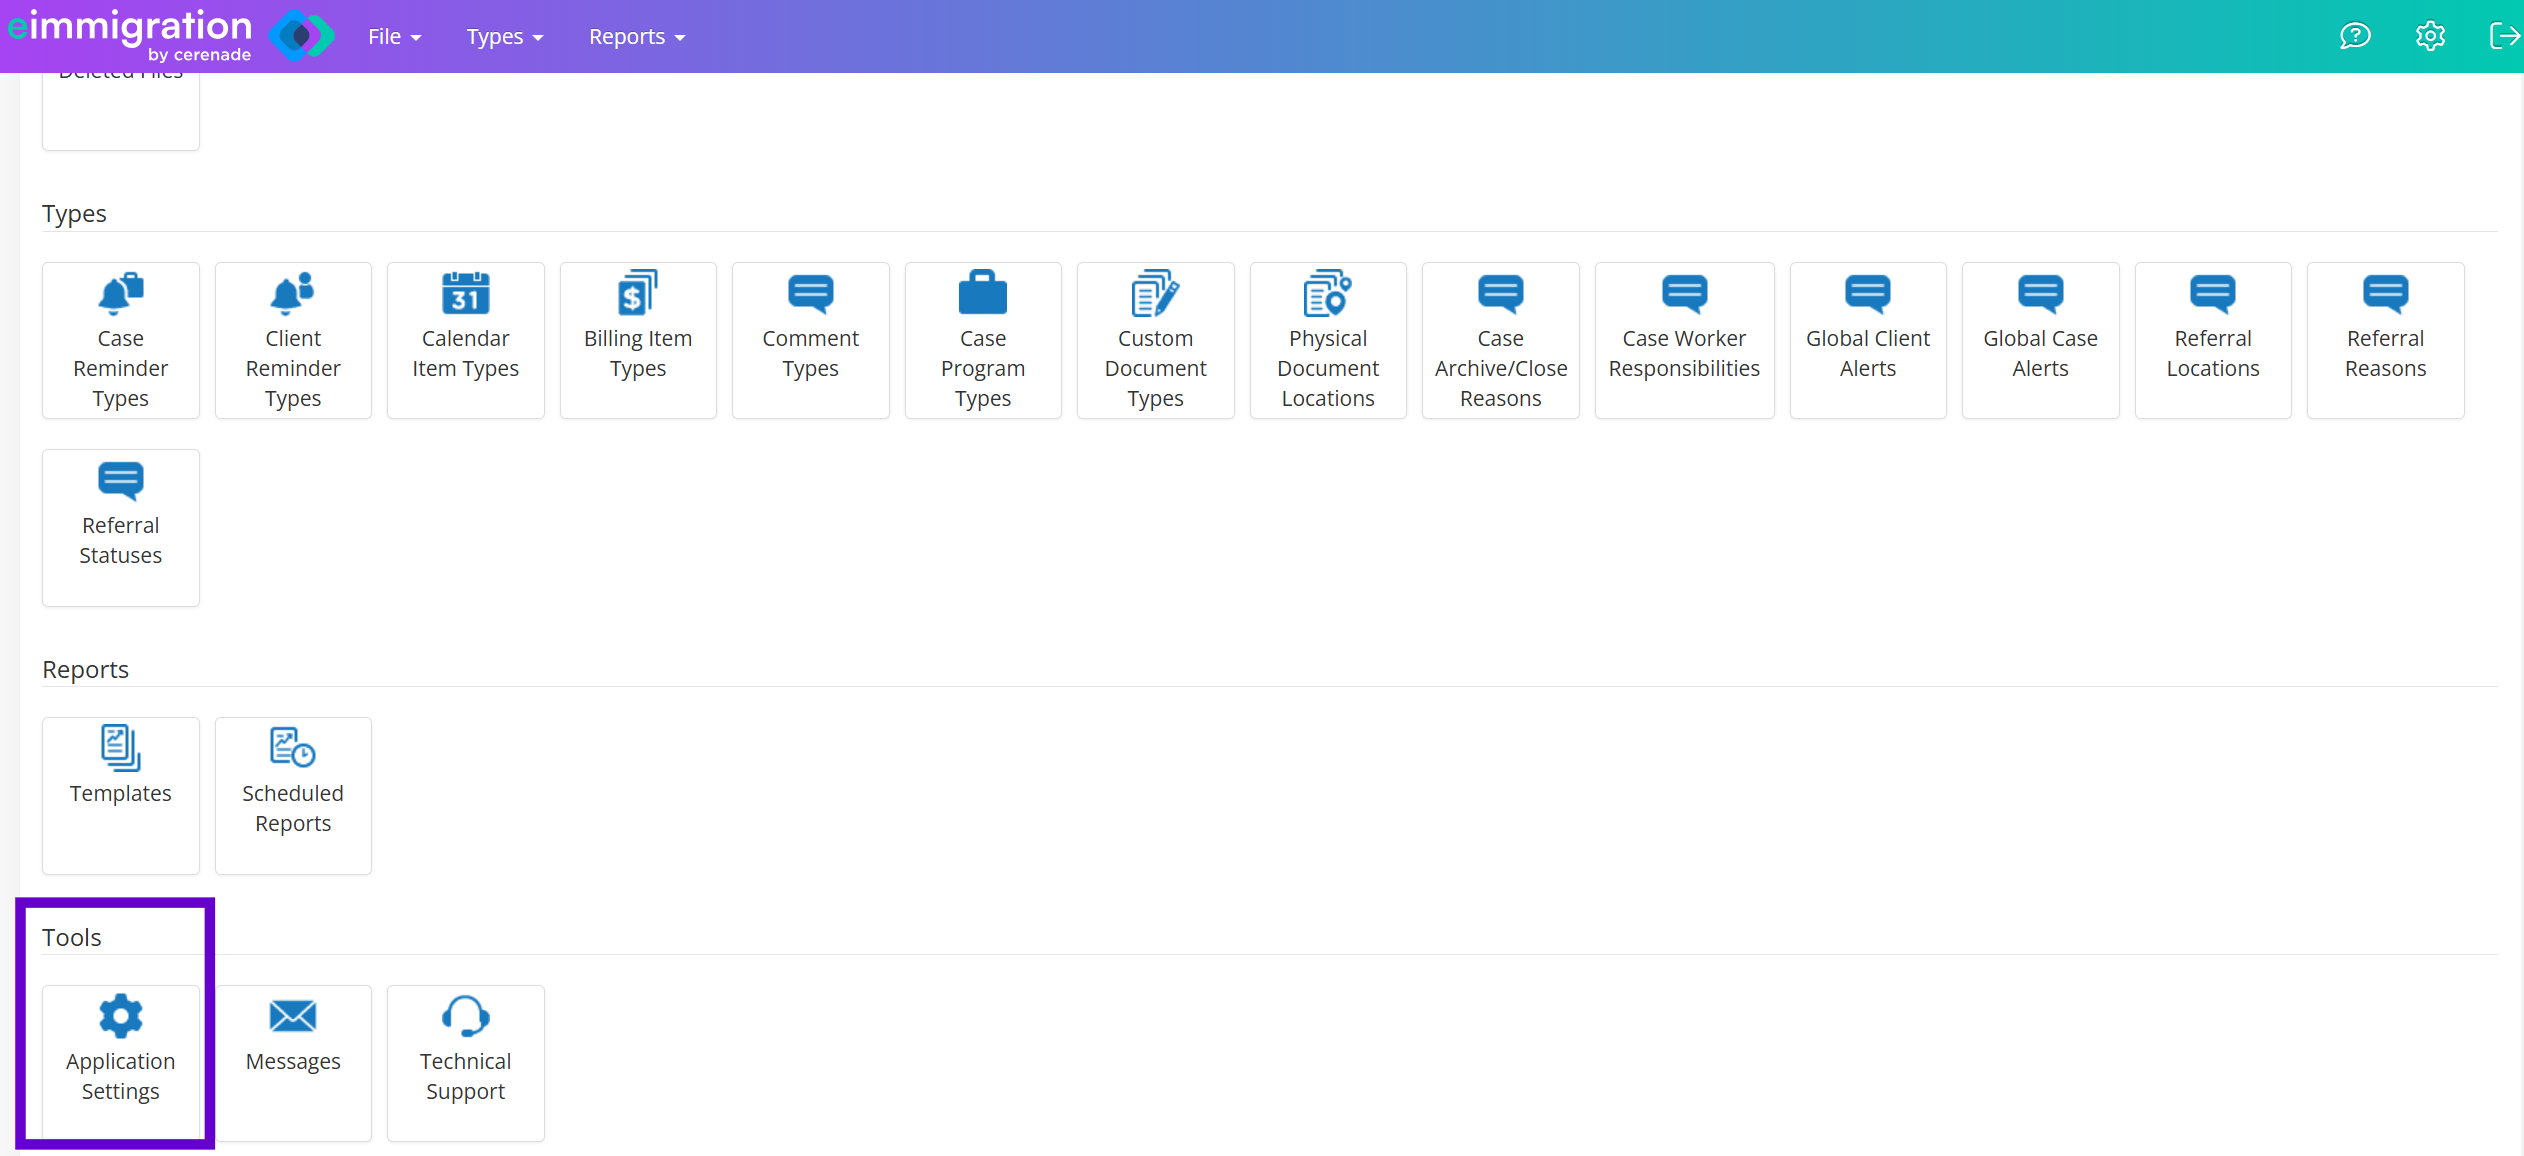
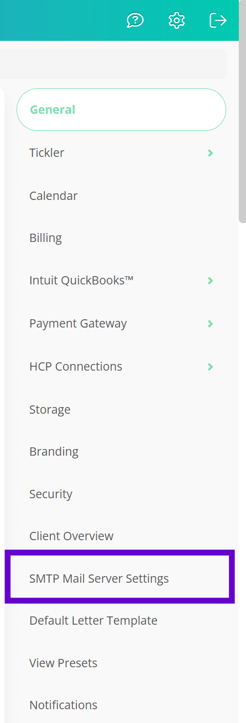
- On the right-hand navigation, locate and click on SMTP Mail Server Settings.
- Once in SMTP Mail Server Settings, click on the "Add Domain Authentication" button.
Step 2: Enter domain and email address.
-
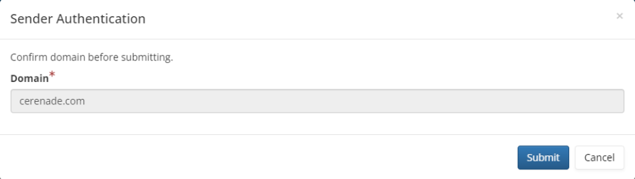
Enter the domain name you want to authenticate in the provided field (e.g., example.com).
-
In the next field, enter an email address associated with the domain (e.g., admin@example.com).
.png?width=625&height=208&name=image%20(12).png)
Step 3: Request verification code
-
Click on the Submit button. Our system will generate and send a verification code to the email address provided.
-
Access your email account and find the email with the subject line “Security Code.” If you don’t see the email, please check your spam folder.
Step 4: Enter verification code
-
Open the email and locate the 6-digit verification code.
-
Return to the authentication page and enter the verification code in the designated field.

Step 5: Confirm domain and submit
After entering the verification code, the system will ask you to confirm the domain you're authenticating. If the domain is correct, click on the Submit button.
Step 6: Update DNS records
Once your domain is confirmed, the system will display a list of DNS records that need to be updated on your domain's DNS settings.
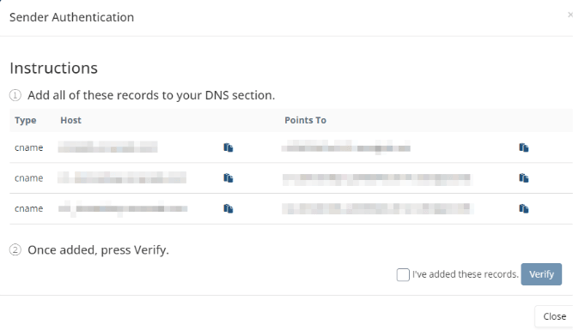
-
Log in to your domain registrar or hosting provider's control panel to access your DNS settings.
-
Locate the DNS records that were provided in our system and add them to your DNS settings. Be sure to enter all the numbers accurately, including the record type, name, and value.
-
Save the DNS changes and allow up to an hour for the changes to propagate across the internet.
Important Notes
Some DNS hosts will automatically add your top-level domain to the end of DNS records you create, which can turn a CNAME for “email.domain.com” into “email.domain.com.domain.com”.
Be sure to follow the convention on existing records in your DNS panel when adding new ones, as sometimes you will only need to add what is to the left of the top-level domain.
|
Host with Domain |
Updated Host without Domain |
|
em123.example.com |
em123 |
|
s1._domainkey.example.com |
s1._domainkey |
|
s2._domainkey.example.com |
s2._domainkey |
Instructions for common hosting providers
-
GoDaddy, follow step above to remove the domain from the host. Add a CNAME record | Domains - GoDaddy Help US
-
SquareSpace – follow step above to remove the domain from the host. Adding custom DNS records to your Squarespace-managed domain – Squarespace Help Center
Step 7: Verify DNS record addition
-
Return to the Domain Authentication Verification section by clicking on the "eye" icon ().
-
Check the box beside 'I've added these records.'
-
Finally, click on the Verify button.
NOTE: If you receive a verification error, it may be due to your DNS hosting provider automatically appending your domain name to the records you added.
-
To resolve this issue, go back to your DNS settings and remove the domain name from the added DNS records. You should only have the record name and value without the domain name (e.g., "example.com" should be removed from "em123.example.com").
-
Save the modified DNS records without the appended domain.
- Return to the domain authentication section in eimmigration and retry the verification process again.
Step 8: Complete domain authentication
Our system will initiate a verification process to confirm that the DNS records have been added correctly. If all DNS records are correctly added and propagated, you'll receive a success message that your domain has been authenticated.

Troubleshooting
If you encounter any errors during verification process, follow these steps:
- TLD Auto-Appending: Some DNS hosts may append your top-level domain to records you create, causing issues. Always follow the convention of existing DNS records in your panel, typically needing only the part to the left of the top-level domain, like "s1._domainkey." instead of "s1._domainkey.domain.com". Additionally, verify your CNAME data on your hosting provider and compare it with "s1._domainkey.domain.org" for accuracy.
- Wait 24 hours: In most cases, DNS changes take effect immediately. If you receive an error, wait up to 24 hours, and then try the verification process again.
- Double-Check Information: Ensure that the DNS records you added are accurate and match the information provided by our system. Common errors include typos, incorrect values, or missing records.
- Contact Support: If issues persist, don't hesitate to contact our support team for assistance. They can provide guidance and help you resolve any technical issues related to DNS record verification.