HOW TO CREATE CLIENT AND CASE CUSTOM FIELDS
eimmigration allows for custom fields to appear on the client profile as well as the case profile. The law firm can decide where they want the field to appear (either in the client profile or case profile), and are set up via the administrative tools.
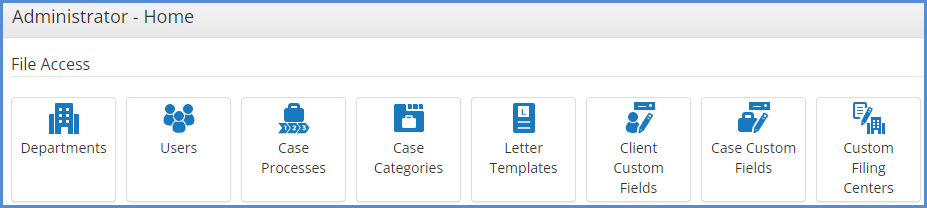
- Once you navigate to the Administrative Tools, click on Client Custom Fields or Case Custom Fields.
- Click on Add Client Custom Field (choosing this would add the custom field under the client profile) or Add Case Custom Field (choosing this would add the custom field under the case profile).
- Create a custom field by entering the name and determining the type of field, then click Save.
- When working with client custom fields, you can also determine whether this custom field should appear under for an individual client, business client, or both.
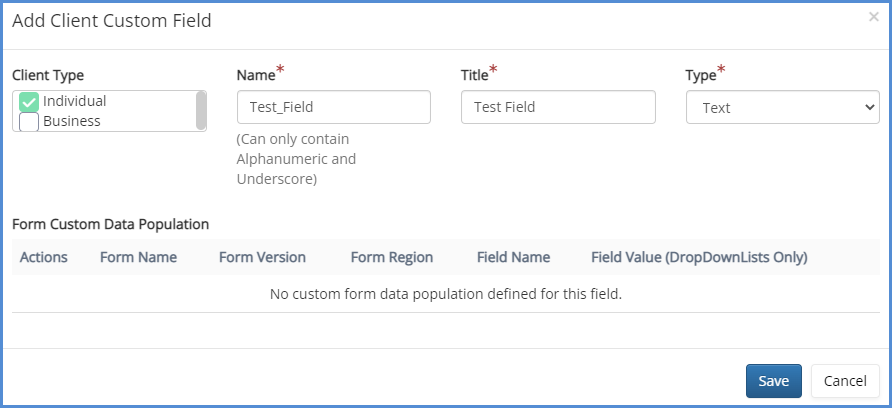
- When working with client custom fields, you can also determine whether this custom field should appear under for an individual client, business client, or both.
Types of fields:
Text - Field allows for open entry
Number - Field allows only for numbers to be entered
Date - Field allows only for dates to be entered, calendar icon appears allowing for date to be selected
Boolean - Field appears as a single check box. You can only check or un-check the box.
Drop List - Field appears as a drop down list for which you can choose what entries appear in the list.
TextArea - A larger text field for more open text entry.
NOTE: The Name field is the label for the custom field that the database will store (and will not be seen in the caseworker portal). The Title is the field name that the caseworker will see when they go to the custom fields tab.
NOTE: For custom field population to forms, please see our article on the matter, here.
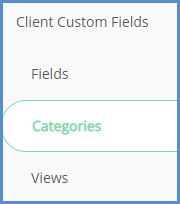
CATEGORIES
- The custom field will be reflected in the Caseworker portal in the client's profile under the Custom Fields sub tab shown below.
- For organization purposes, you are also able to organize custom fields into specific categories. To do this, navigate to either Client or Case custom fields, then click on Categories tab.
- Enter the name of the Custom Field Category, then click on Add Client Custom Field.
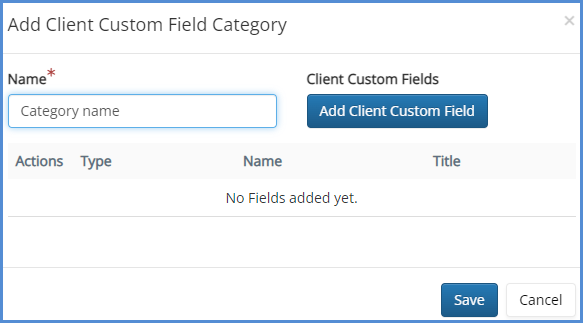
- Select the custom fields that you'd like to place under the named category in step 6. Once you've selected all appropriate items for this category, click Add Client Custom Field.
- Click Save.