ADVANCED AUTHENTICATION
Advanced Authentication is an optional module that allows you to enable Two-Factor Authentication, and/or SSO (Single Sign-On) from either Google or Microsoft EntraID. If you don't have access to this module but would like to enable Advanced Authentication, please contact your Account Manager.
This article covers the process to set up:
For our Advanced Authentication video, click here.
NAVIGATE TO YOUR SECURITY TAB
You can access and enable your Advanced Authentication settings, in the Security tab in your Admin Portal.
- Log in to eimmigration.
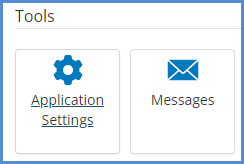
- Navigate to the Administrative Tools.
- Click Application Settings.
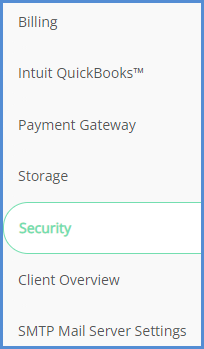
- Click the Security tab.
MULTI-FACTOR AUTHENTICATION (2FA/MFA)
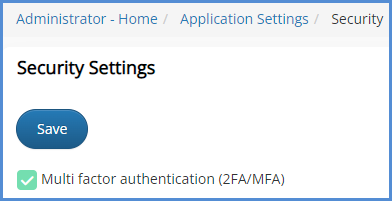
- From the security settings, check the box for Multi factor authentication. Click Save.
- The next time a caseworker logs in, they will be prompted to receive a code, either by phone or Email. Click Submit.
- By phone will send a text message code to the mobile number associated with the caseworker account.
- By Email will send a code via Email to the address associated with the caseworker account.
- Once you've received the code, enter it into the appropriate field. Choose to either remember the browser or not, then click Submit.
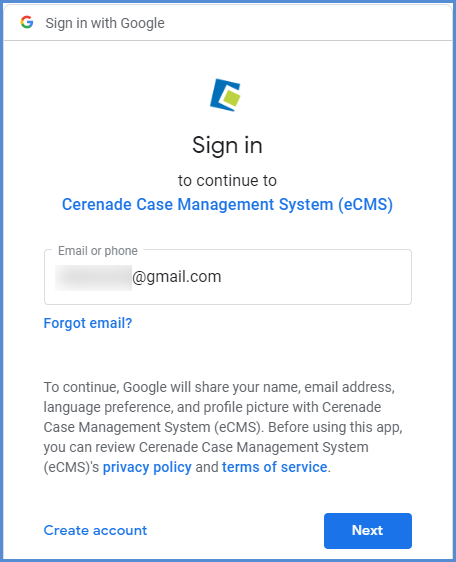
ENABLING SSO USING GOOGLE AUTHENTICATION
- The way the system matches users from Google and eimmigration is by user name. Therefore, in order for Google authentication to work, you must make sure your eimmigration username is the same as your Google login Email address. Once you can verify this, proceed to step 2.
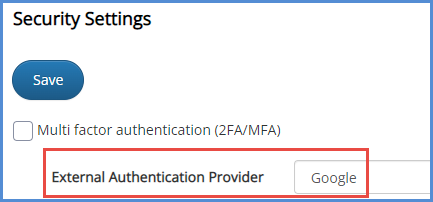
- From the security settings tab, select Google as the External Authentication Provider. Click Save.
- The next time you access your eimmigration site on a new session, you'll see the Google Authentication instead of the standard eimmigration login page. Sign in using your Google account credentials.
ENABLING SSO USING ENTRAID
This guide walks you through configuring Single Sign-On (SSO) using Microsoft Entra ID for your eimmigration application.
Important Information
-
User Matching: The system matches users from Entra ID to caseworkers by login username, which should match the Entra ID User Principal Name (UPN). The UPN is typically the user's primary email address.
-
Multi-Factor Authentication: You can have 2FA/MFA enabled alongside Entra ID. When signing in via Entra ID, you will also complete any MFA requirements configured in your Entra ID tenant.
Step 1: Configure Security Settings
Navigate to the Security Settings page in your eimmigration application. Here you will configure the connection to your Microsoft Entra ID tenant:
- External Authentication Provider: Select "Microsoft Entra ID" from the dropdown.
- Tenant ID: Enter your Microsoft Entra ID Tenant ID. You can find this in the Azure portal under Azure Active Directory > Overview.
- Tenant Name: Enter your organization's domain (e.g., yourdomain.com or yourdomain.onmicrosoft.com).
Click 'Save' to apply your settings.

Step 2: Administrator Consent (First Admin Login)
When a user with administrator privileges in your Microsoft tenant accesses the application for the first time after SSO is configured, they will see a permissions consent prompt from Microsoft.
The eimmigration application requests the following permissions:
- Read and write user and shared calendars — Allows the application to access calendar data for scheduling and appointments.
- Sign in and read user profile — Enables SSO authentication and retrieves basic user information.
- Have full access to user calendars — Provides complete calendar integration capabilities.
- Have full access to all files user can access — Allows the application to work with user files for document management.
Review the requested permissions and click Accept to authorize the connection.
Tip: Check the "Consent on behalf of your organization" checkbox to grant permissions for all users in your organization at once. This prevents each user from seeing this prompt individually.

Step 3: Non-Admin User Login (Before Admin Consent)
If a non-admin user attempts to log in before an administrator has granted consent for the organization, they will see a message indicating that admin approval is required.
From this screen, users have the following options:
- Sign in with an admin account if they have access to one
- Return to the application without granting consent
- Request approval (if this option is enabled in your tenant) — this sends a consent request to your organization's administrators
Note: If admin approval requests are enabled, administrators can review and approve pending requests in the Azure portal under Enterprise Applications > Admin consent requests.

Step 4: Verify SSO Configuration in Azure
Once an administrator has granted consent, you can verify that SSO is properly configured by checking the Azure portal.
Navigate to the Azure portal (portal.azure.com) and go to Enterprise Applications > All applications. You should see "Cerenade eCMS (eimmigration.com)" listed, confirming that the application has been successfully added to your organization's tenant.
Users in your organization can now authenticate to eimmigration using their Microsoft Entra ID credentials.
