INTAKE WIZARDS AND TRANSFERRING DATA TO ASSOCIATED FORMS
This article will explain how to utilize an Intake Wizard version of a form, and then how to transfer this data to it's related form(s). Note that not every form has an intake wizard version of its corresponding form. Finally, for the purposes of this article, we'll look at the I-944 form. For the video guide on this functionality, click here.
SENDING THE INTAKE WIZARD TO A CLIENT
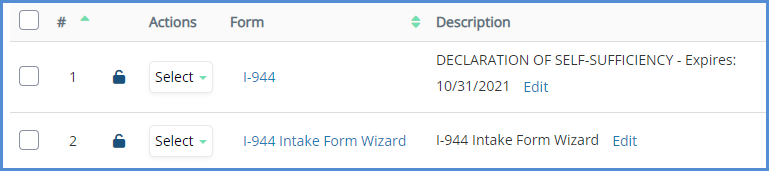
- Once you've added both the I-944 Intake Wizard and I-944 form to the case, open the Intake Wizard and link your associated client to the wizard and navigate through the form to ensure the data you already have has populated to the form.
- Check the form, and choose to Email the form as Editable HTML. This will send the wizard to the client for them to review and complete.
- For more information on Emailing forms as Editable HTML, click here.
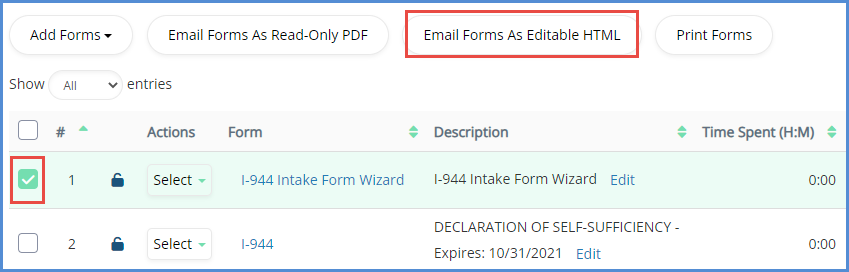
- For more information on Emailing forms as Editable HTML, click here.
- Once you're received the form back from the client, accept the form via the eimmigration Mailbox. Once the form has been accepted, it will update the Intake Wizard located within the case.
TRANSFERRING DATA TO THE ASSOCIATED FORM
- Now that the Intake Wizard has been completed by the client and accepted from the Mailbox, you can open and review it if you'd like, otherwise move to the next step.
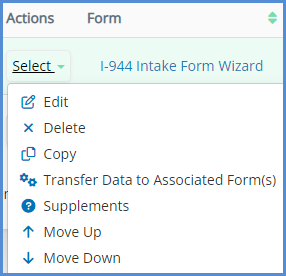
- Under the actions column of the Intake Wizard, click Transfer Data to Associated Form(s) button.
- Check the box next to the I-944, and click Transfer Data.
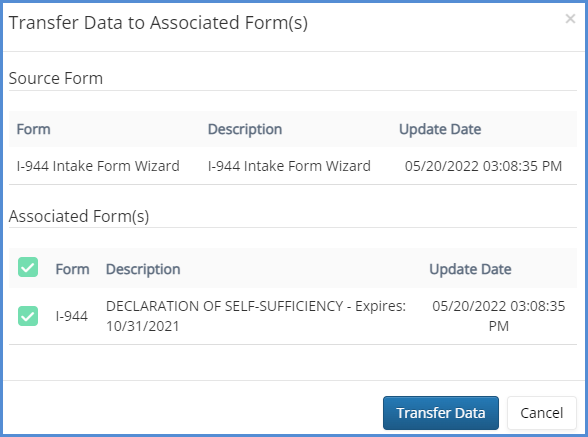
- You've successfully transferred the data from the Intake Wizard to the Form.
- Note that you could do this in reverse as well. For example, if you're E-Filing a form such as the I-130, but have not completed the intake wizard for E-Filing, you can transfer data from the I-130 to the I-130 Intake Wizard.