GENERAL APPLICATION SETTINGS
The General Application settings section of the Administrative Tools is a powerful tool for customizing your eimmigration site. This article will outline each portion of the general application settings.
To get to the general application settings section, navigate to the Administrative Tools., and click Application Settings.
GENERAL SETTINGS
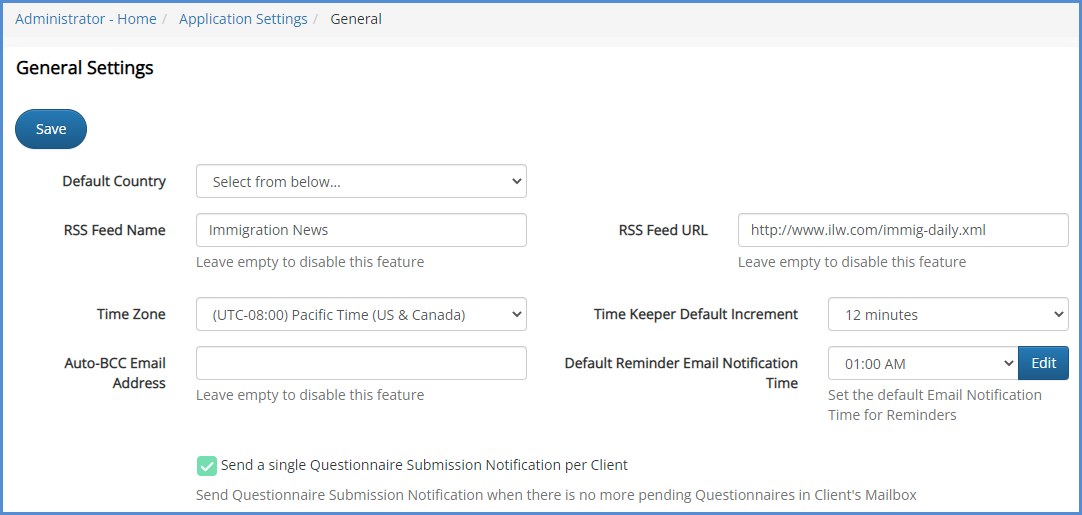
- Default Country - Whenever a client is created, the country of birth for the client will populate with what is set here. To have no country of birth auto populate, choose "Select from below..."
- RSS Feed Name & RSS Feed URL - These fields link to news module on the caseworker portal. If you have an RSS news feed that you would like to use, label it, and enter the RSS link here. Otherwise, leave this blank.
- Time Zone - Set the time zone of your office location.
- Time Keeper Default Increment - This setting is ONLY for those users who utilize the optional Time Keeper module. If you prefer to have your timer entry round to the nearest 5, 6, 10, 12, 15, 20, or 30th minute, you can set it from here.
- Auto-BCC Email Address - Any Email sent through the system will have the Email address included here be a recipient as a BCC.
- Default Reminder Email Notification Time - Sets the default Email notification time for reminders.
- Send a single Questionnaire Submission Notification per Client - By default, anytime a client submits a portion of the questionnaire, the caseworker is notified. However, if you prefer to receive only 1 notification when ALL questionnaires have been submitted, check this box.
FORM SETTINGS
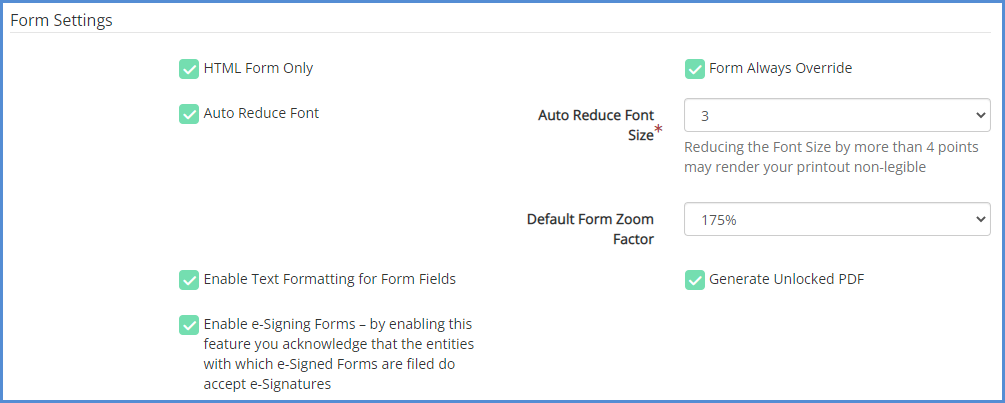
- HTML Form Only - If you prefer to use the forms by default in .FAR mode (must have a Windows based PC and be using Internet Explorer as your browser), check this box. Note that this setting can also be changed on the caseworker side.
- Form Always Override - If you would like to be able to type into the forms, and override and auto populated data, this box should be marked. Note that this setting does not pertain to name fields that are highlighted yellow. Those fields are always locked on the forms.
- Auto Reduce Font & Auto Reduce Font Size - These settings determine if you would like, by default, to have the font automatically reduce, and by how many points it should automatically be reduced by. For more information on auto-reducing fonts, click here.
- Default Form Zoom Factor - This setting will allow for you to determine the default zoom for when you open a form (if you're constantly zooming in and out of the form before working on it, change the default setting here).
- Enable Text Formatting for Form Fields - This setting will enable a "Fonts" button from within the form. This will allow you to change the font type and size on a field by field basis from within the form.
- Generate Unlocked PDF - When marked, this will give the caseworker the ability to generate and send fully editable PDFs that can be modified outside of the eimmigration system. Please note that this is only possible if the end-user has a professional PDF program that allows for such capabilities...A simple PDF reader type of program will not do.
- Enable e-Signing Forms - Allow for digital signatures on forms. Please note the acknowledgment on screen before enabling.
SECURITY SETTINGS
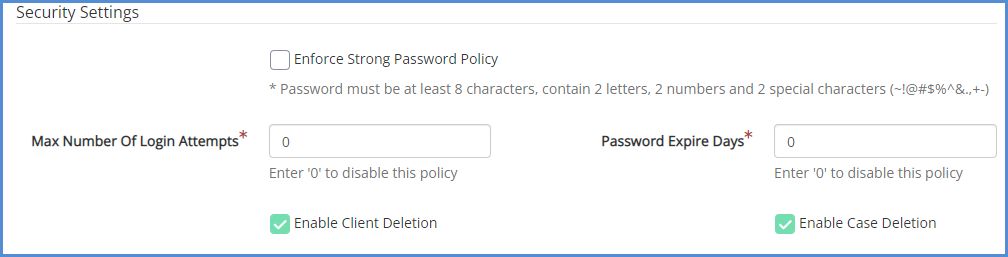
- Enable Strong Password Policy - This requires all passwords (administrator, caseworker, or client) to match the requirements listed.
- Max Number Of Login Attempts - Your account will lock after the number of attempts listed in this field. Once the account is locked, you must use the forgot password link on the login page to reset your account.
- Password Expire Days - You must reset your password after the number of days listed if this is set to anything greater than 0.
- Enable Client Deletion & Enable Case Deletion - These settings enable or disable the case/client deletion boxes from the caseworker profile access rights table. Once enabled, you can go into the users>caseworker>caseworker profile, and grant access for a caseworker to be able to delete a client and/or case.
CASE SETTINGS
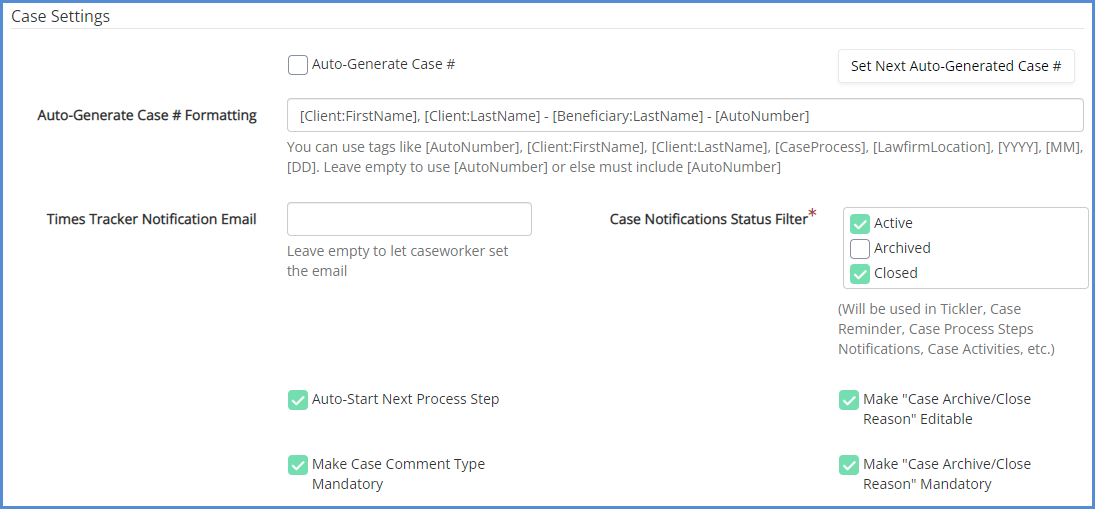
- Auto-Generate Case # - When a case is created, you can have the case number automatically generate. If you'd like for the auto case number to be automatically marked when going through the case wizard, mark this box.
- Set Next Auto-Generated Case # - This button will allow you to set the next case #. It uses an auto counter that moves up 1 number from whatever is set, anytime a case is created. For example, if it is set to 2734, and a case is created, this number will move to 2735.
- Auto-Generate Case # Formatting - When using the auto-generate case # feature, you can format the case # with the tags listed in the screenshot above.
- Times Tracker Notification Email - This field only pertains to users who are subscribed to the optional times tracker module. If set, all automatic times tracker notifications will go to this Email address.
- Case Notifications Status Filter - This box will filter out notifications for any types of cases that are not marked. For example, if only Active is checked, then you will not receive or see any tickler notifications, case reminders, or process steps for cases marked as Archived or Closed. If all 3 boxes are checked, you will receive any and all notifications regardless of case type.
- Auto-Start Next Process Step - If checked, when working on process steps, and an end date on a step is entered, the next step will automatically populate the start date with the same day as the previous step's end date.
- Make XXXX Mandatory - Checking this boxes will make the described items mandatory when trying to work on the case.
CLIENT SETTINGS
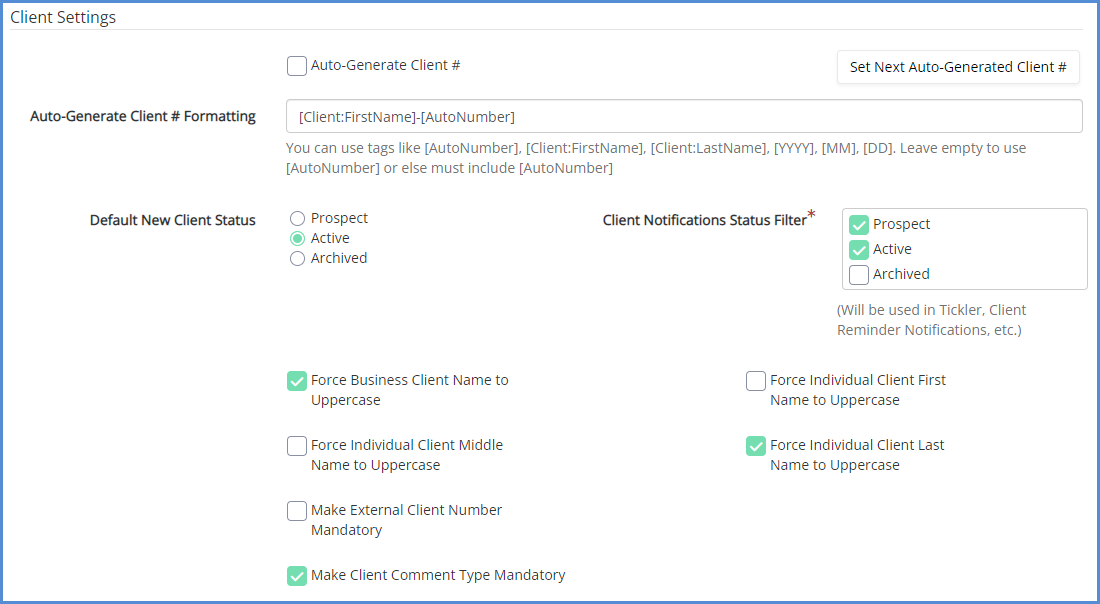
- Auto-Generate Client # - Decide whether or not a client number is automatically created when a client profile is created.
- Next Auto-Generated Client # - This field is an auto counter that moves up 1 number from whatever is set, anytime a client is created. For example, if it is set to 190, and a client is created, this number will move to 191.
- Auto-Generate Client # Formatting - When using the auto-generate client # feature, you can format the client # with the tags listed in the screenshot above.
- Default New Client Status - Sets the default status for any new client profile that is created in the system.
- Client Notifications Status Filter - This box will filter out notifications for any types of client profile that is not marked. For example, if only Active is checked, then you will not receive or see any tickler notifications, client reminders, etc for client profiles marked as Prospect or Archived. If all 3 boxes are checked, you will receive any and all notifications regardless of client type.
- Force XXX Name to Uppercase - When these boxes are marked, any name entered into the respective name field will automatically be capitalized in the profile, and on all forms. Please note that enabling these settings will only affect client profiles that are created/modified from that point forward. These settings will not change any previously created client profiles.
- Make External Client Number Mandatory - When marked, this will require the caseworker to enter in a number into the "External Client Number" field within the client profile.
- Make Client Comment Type Mandatory - When marked, this will require the comment type on client logs required.