Auto-Reducing and Re-sizing Fonts
In eimmigration, when forms are printed, fonts can be automatically reduced to fit a given field or manually reduced to accomplish the same thing. This is dependent on settings that can be toggled via the administrative tools as well as on the form.
Enabling and setting auto-reduce function via the Administrative Tools (the default setting for ALL caseworkers):
- Navigate to Administrative Tools.
- Click on the Application Settings Module.
- Under the Form Settings section, make sure the Auto Reduce Font option is checked.
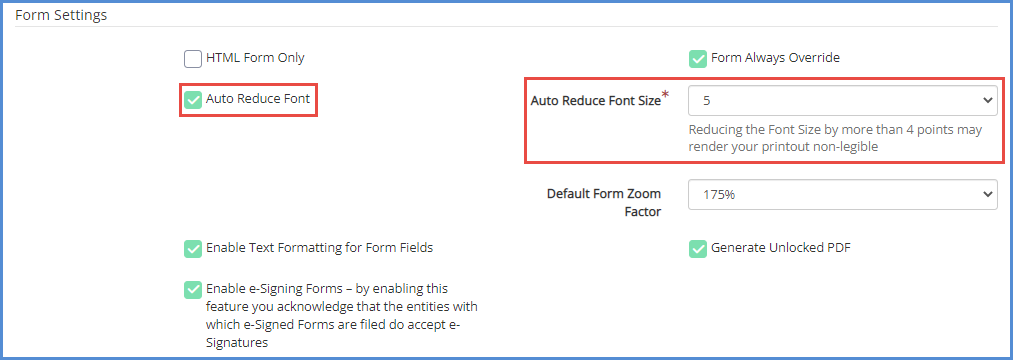
- Select your Auto Reduce Font Size.
- If a font needs to be reduced, this option will determine by how many points the font will be reduced by. In other words, if this is set to 4, the font will reduce to a 7 points (11 minus 4 equals 7).
- You can reduce the font by up to 6 points, however it is at your discretion as to if it will be readable once it prints out (we are not liable if a form gets rejected due to unreadable font).
5. Click the Save button.
Enabling and setting auto-reduce function via the Caseworker Portal (the setting for the caseworker that is logged in):
- Login to the Caseworker Portal.
- Navigate to User Preferences.
- Under Form Settings, make sure the Auto Reduce Font option is checked, and select your Auto Reduce Font Size.
- Note: If a font needs to be reduced, this option will determine by how many points the font will be reduced by. In other words, if this is set to 4, the font will reduce to a 7 points (11 minus 4 equals 7).
- Note: You can reduce the font by up to 6 points, however it is at your discretion as to if it will be readable once it prints out (we are not liable if a form gets rejected due to unreadable font).
- Click the Save.
Manually modifying font size and type for a given field:
- Navigate to the Administrative Tools.
- Click on the Application Settings module.
- Under the Form Settings section, make sure the box shown below is checked.
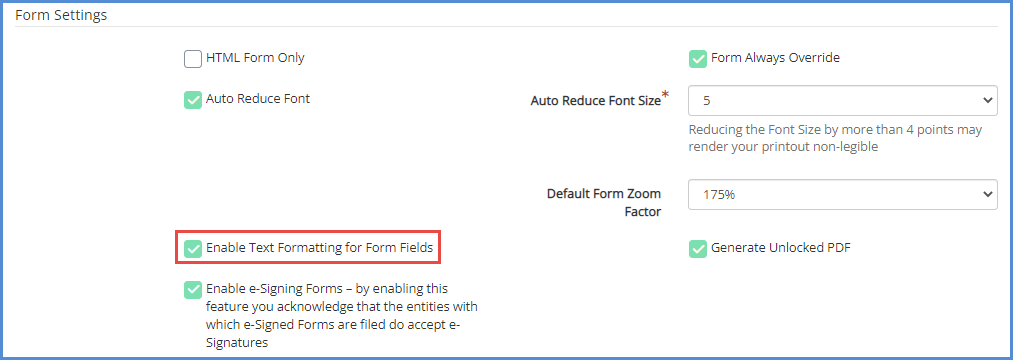
- Click the Save button.
- Next, log in to the caseworker portal, and open up any form.
- Click into the field that you wish to manually change the font for, and then click the Font button on your form toolbar.

- In the pop-up, you can update the font settings for the current field by changing the font type, size, attributes, and line-spacing. Then click OK.
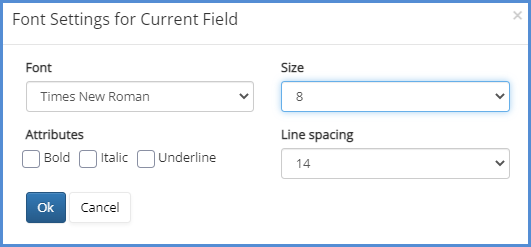
- The form will refresh and you will notice that the field in question will now be resized to your specifications.
- Click the Save to Server button to save your update(s) to the form.
