TIME KEEPER
The Time Keeper module is an add-on module, if you do not have access to this, and wish to have access, please contact your account manager for more information. For our Time Keeper video, click here.
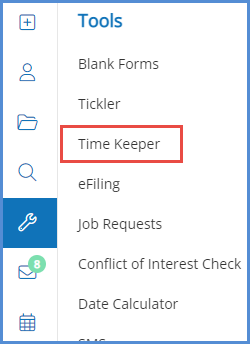
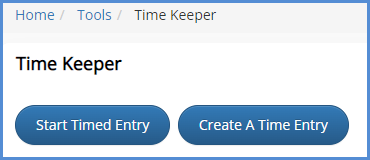
- Hover over tools, then click on Time Keeper.
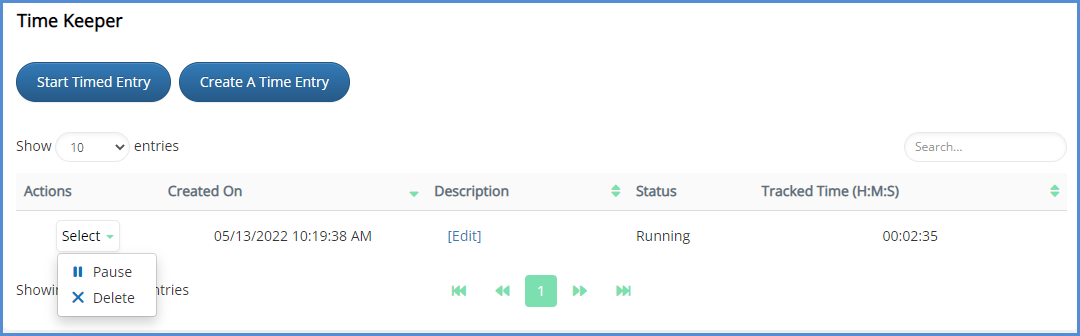
- Click the Start Time Entry button (for details on the Create Time Entry button, scroll below).
- A time entry will appear and start running.
- At this point, you can click the Start Time Entry button again to add as many timers as you would like. Timers can run concurrently.
- Click the Edit link to edit the description of the time entry.
- Click pause icon to pause a time entry.
- The icon will switch to a
 icon, and by clicking that, the timer will start again.
- The icon will switch to a
- Click the delete icon to delete a time entry.
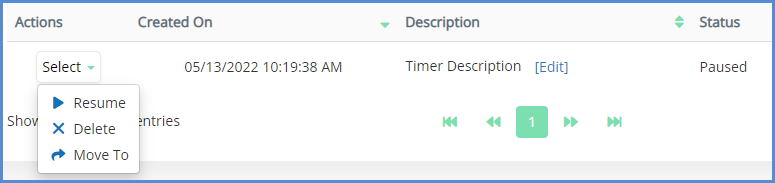
- Once the paused, and the timer is stopped, click Move To. This icon will allow you to move the entry.
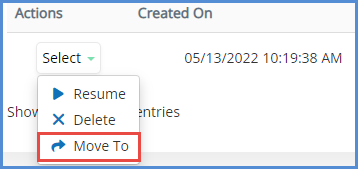
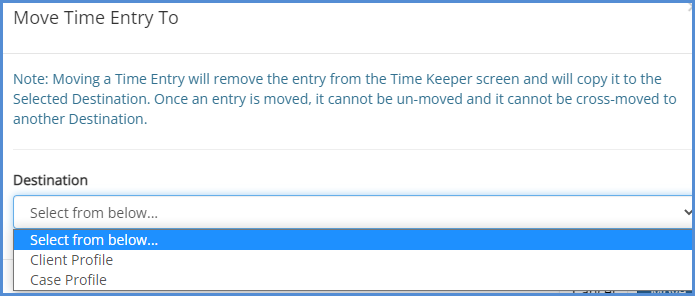
- A pop up will appear which will give you the option of moving a time entry to either the Client profile or the Case profile.
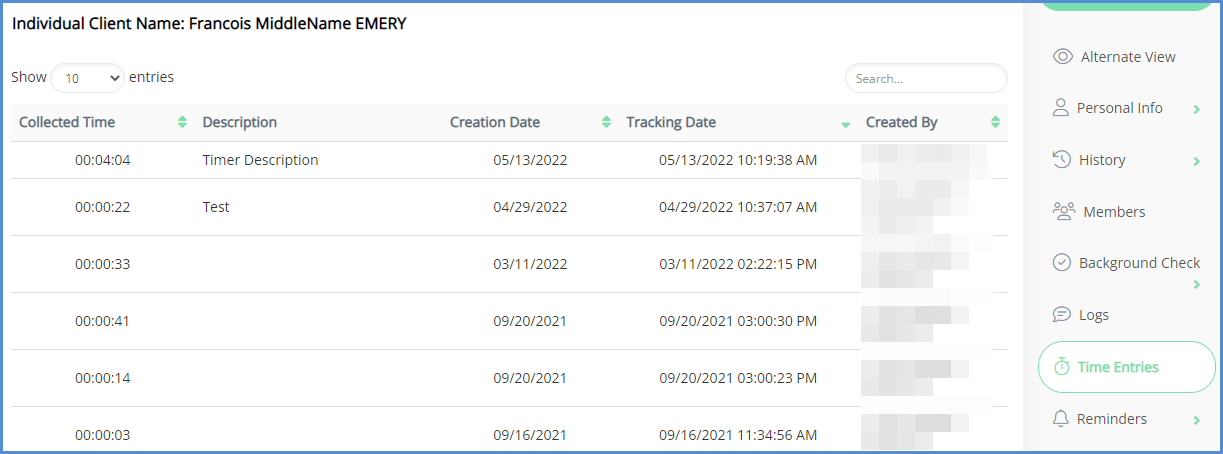
- If you choose Client Profile, this will be the resulting screen:

- You can search for the client profile that you'd like to move the time entry to, and then either click Move (to move the Time Entry, and then stay in the Time Keeper module) or Move and Navigate to the Client Time Entries.
- Once you move the time entry, it will appear in the Client's profile>Time Entries tab.
- If you choose Case Profile, this will be the resulting screen:
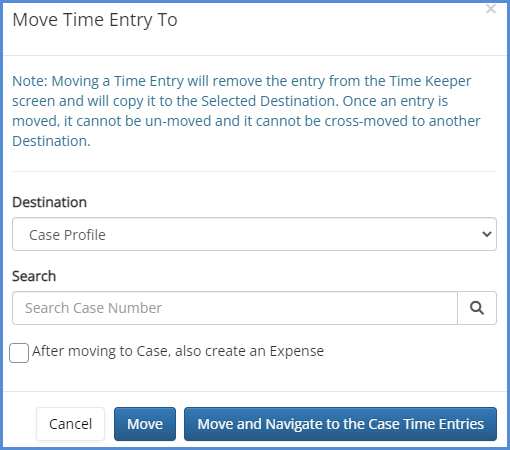
- You can search for the case number you'd like to move the entry to. Once you select your case, you can either click Move (to move the Time Entry, and then stay in the Time Keeper module) or Move and Navigate to the Case Time Entries.
- Note: If you have access to the eimmigration Billing module, you can choose to create an Expense based on the Time Entry being moved. This can be done at its current stage, or at a later time, after you move the Time Entry to the case. For more on creating expenses based on Time Keeper entries, please see our article on Time and Billing.
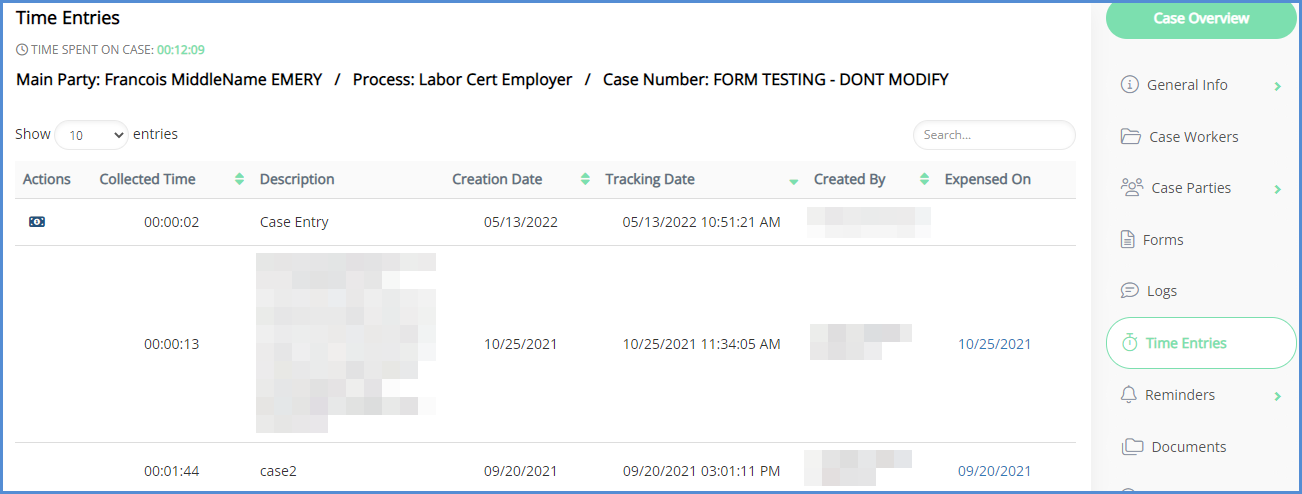
- Once you move the time entry, it will appear in the Case profile>Time Entries tab.
- You can search for the case number you'd like to move the entry to. Once you select your case, you can either click Move (to move the Time Entry, and then stay in the Time Keeper module) or Move and Navigate to the Case Time Entries.
CREATING A TIME ENTRY (MANUALLY SETTING THE TRACKED TIME)
- In order to manually set the time for a Time Entry, you first need appropriate access rights. This is set via the administrative tools, under Users, and then by modifying a caseworker's profile>access rights. Anyone who has administrative tools access for your site can do this. For details on updating access rights, click here.
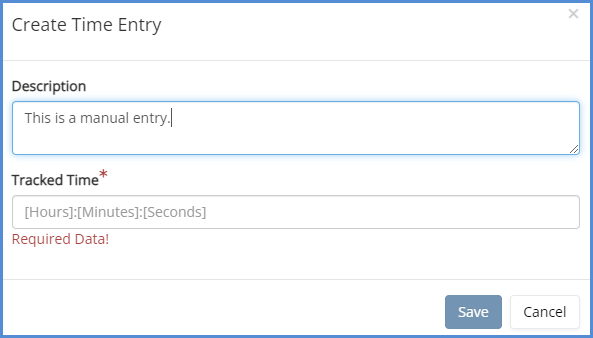
- Click the Create Time Entry button.
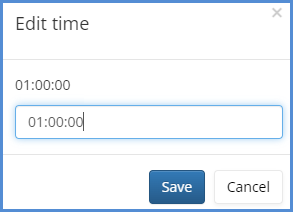
- Enter the description (if any), and the tracked time.
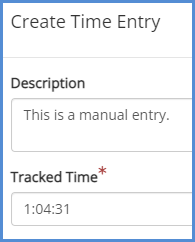
- Click Save.
- Before moving the Time Entry, you can still edit the tracked time.