CONFLICT OF INTEREST
The Conflict of Interest Check module is an add-on module, if you do not have access to this, and wish to have access, please contact your account manager for more information. For our conflict of interest video, click here.
DISCLAIMER: This feature presents some considerations that might be helpful in your practice. It is not intended as legal advice or opinion. It is not intended to establish a standard of care for the practice of law. There is no guarantee that following these guidelines will ensure your compliance with your ethical or legal duties to your clients. Further, your State may have different or additional ethical rules or laws for compliance with any such issues. Please use the information provided herein as a guideline, but perform your own due diligence with respect to complying with the ethical and legal standards in your State.
- From the navigation bar, click on the Tools icon, then click Conflict of Interest Check.

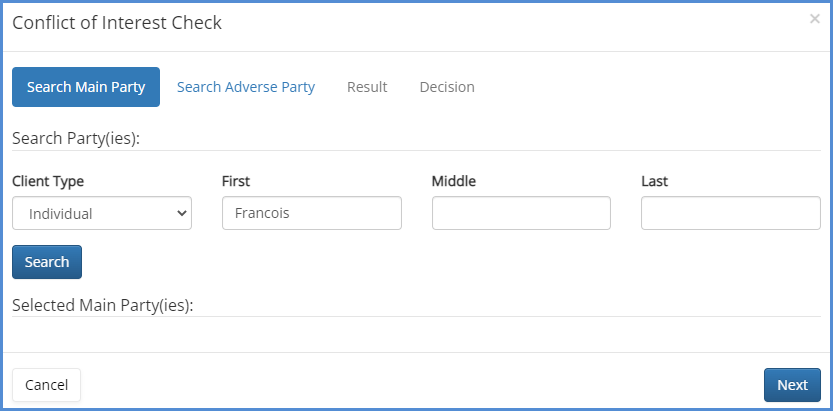
- Choose either Individual or Business for the party type, then enter all or part of the person's name. Click Search.
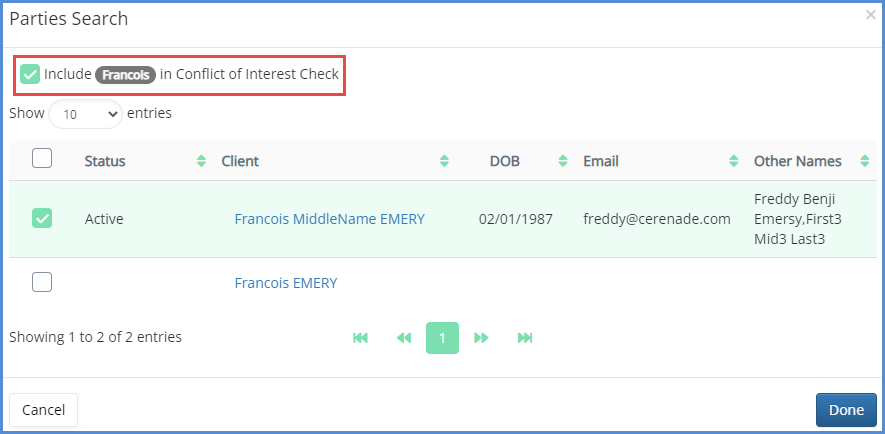
- Select the appropriate individual, and/or if necessary, also select the box to include the searched name in the conflict check (regardless of client specificity). Click Done.
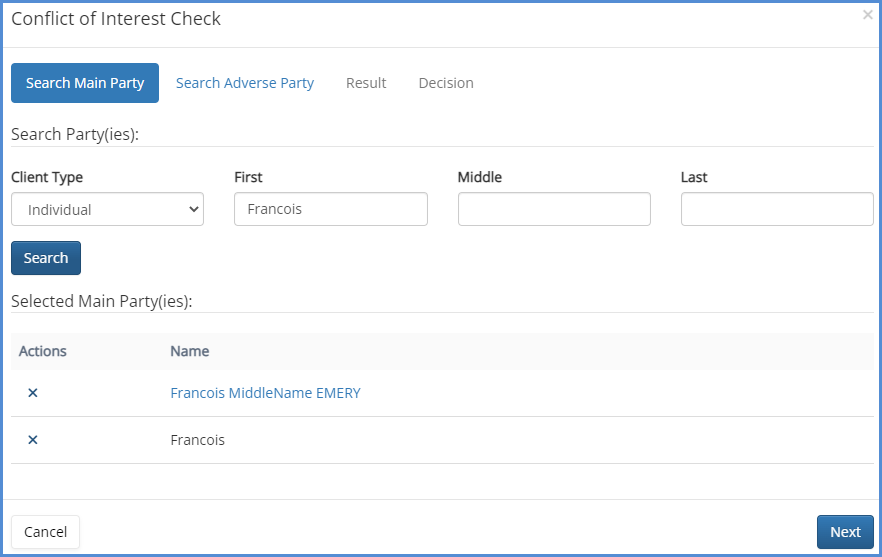
- The selected names will appear in your window, you can repeat steps 2-3 to add more parties, or click Next.
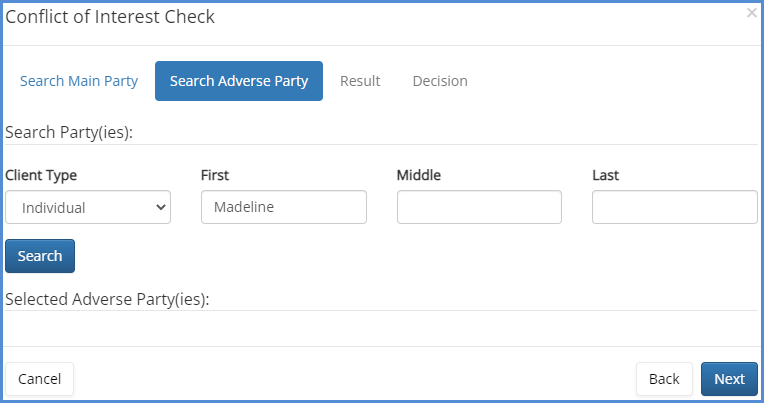
- Now, you will search for an adverse party. Choose the party type, enter the individual or business name, and click Search.
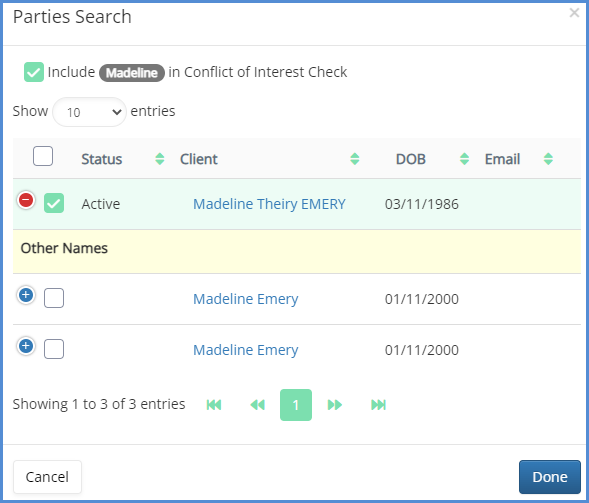
- Another pop up will appear, select a contact(s) name, and/or to include the searched name itself in the conflict check. Click Done.
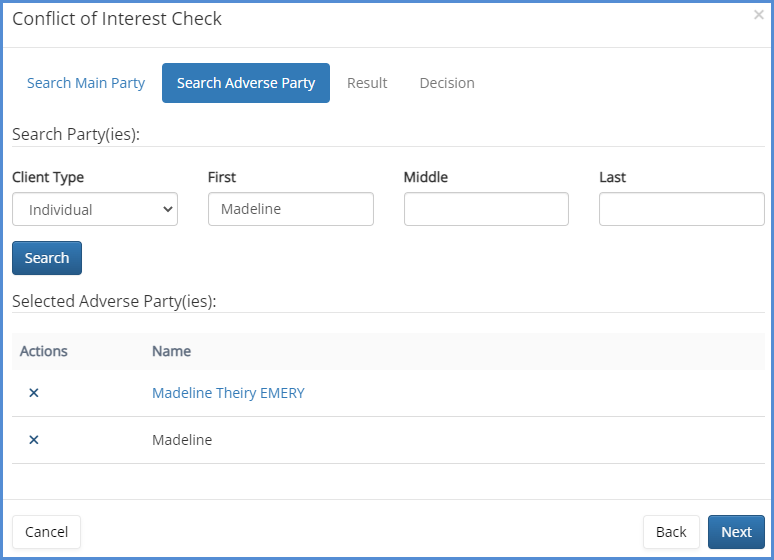
- The selected names will appear in your window, you can repeat steps 5-6 to add more parties, or click Next.
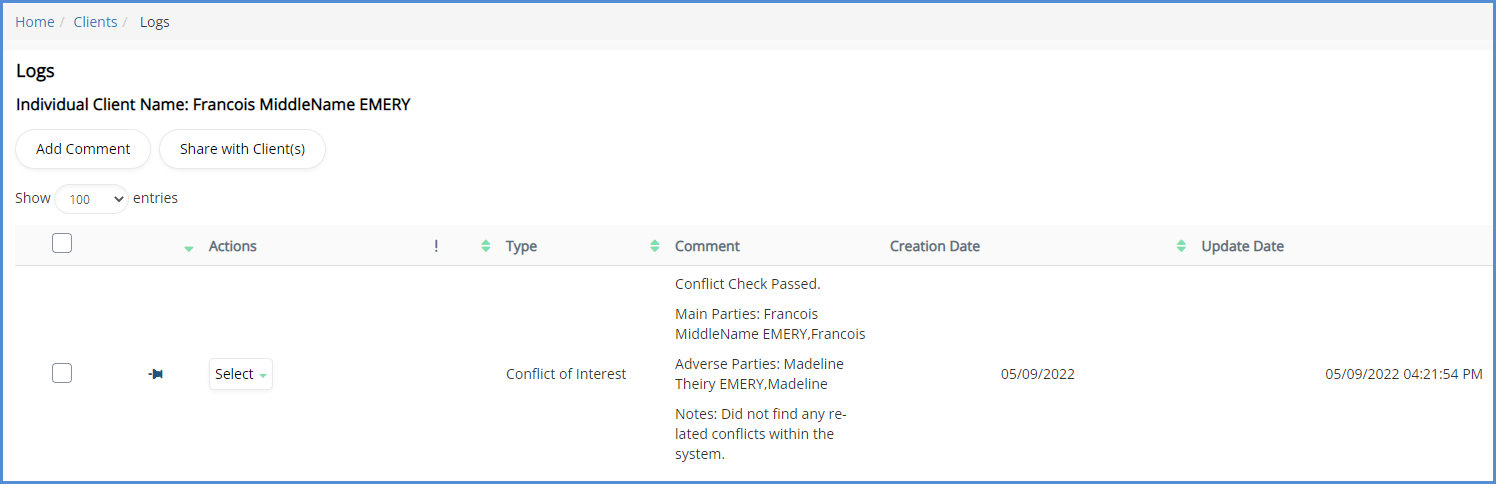
- The system will run a thorough search and will show results for any related clients, cases that may include the adverse party, along with any client/case logs that include the searched names. From here you can examine the resulting clients, cases, and logs to determine if there are any conflicts. Once you've made a decision, click Next.
- NOTE: In order for the conflict checker to work, the adverse party(ies) names must appear somewhere in either the main parties profile, members, client logs, or case logs tab. If the name of the adverse party is only entered on a form and nowhere else, the conflict check will not show any results.
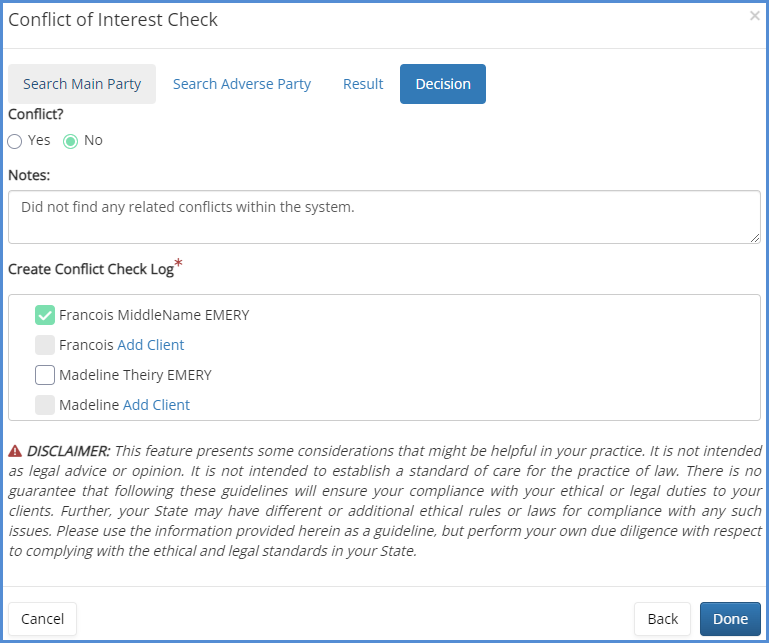
- On the Decision page, choose either yes or no for the conflict question, enter a reason for your determination, and then select the profile(s) where you'd like the conflict decision log to be added to. If this is a new client, you can click the Add Client button and a pop up will appear to take you through creating a client profile where this log will be stored. When finished, click Done.
- The pop up will now close. To see that the log has been created, go to the client profile(s) where you chose to save the log, and you will see it there.