HOW TO CREATE BILLING ITEMS
In order to be able to create billing Items, you need to have the Billing module activated in your license. Billing is an Add-on Module which can be requested by contacting your sales representative. For our billing tutorial video, click here.
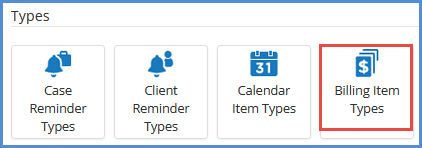
- From Administrator tools, click on Billing Item Types. Adding your own Billing Item Types allows you to categorize your billing items when creating them in later steps.
- Click on Add Billing Item Types.
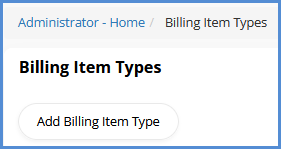
- Enter the name of your billing item type, and click Save.
- Repeat the above steps 2 & 3 until you've added your desired billing item types.
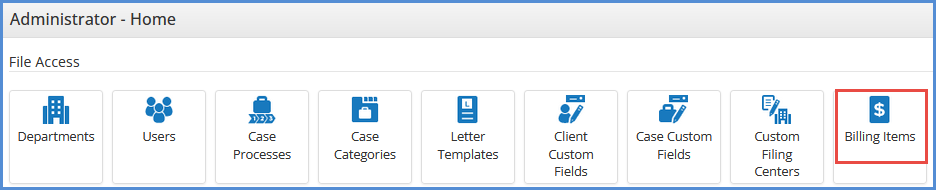
- From the administrator tools homepage, click on Billing Items. This is where you'll create your billing items that will ultimately be added as expenses to a case and then added to your invoices within the caseworker portal.
- Click on Add Billing Item.
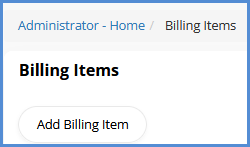
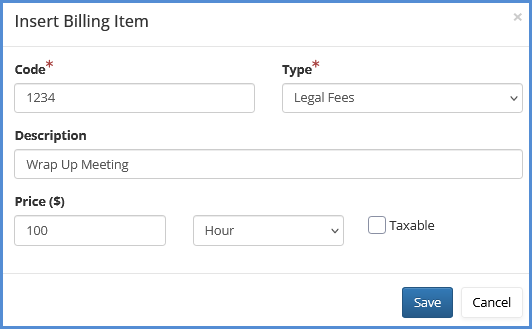
- For the Code field, this has to be an alphanumeric entry and can be whatever you desire. Note that the Billing Items are sorted alphanumerically.
- For the Type drop-down, select the desired billing item type. This drop-down corresponds to the billing item types created in steps 1-4 above.
- For the Description field enter the name of your billing item.
- For the Price fields, enter the cost of the billing item, choose if the item should be a flat rate or hourly, and if necessary, select the box for Taxable. For hourly, choose Hour from the drop down.
- Repeat steps 6-10 until your desired billing items have all been created.
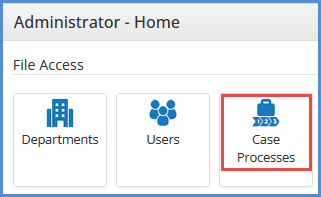
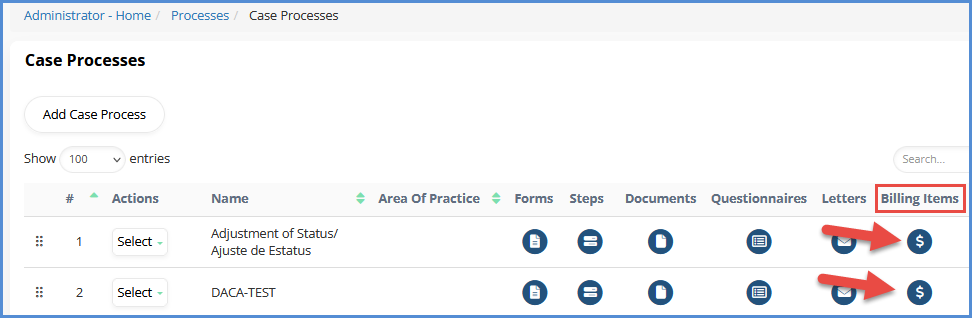
- To associate Billing Items with case processes, navigate to the Case Processes module within the Administrator Tools.
- For the desired case process, click on the Billing Items button.
- Click on Add Process Billing Item(s).

- Select the desired billing items created in steps 6-11, and click Add Billing Item.